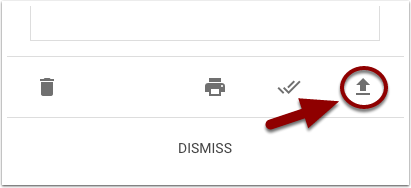
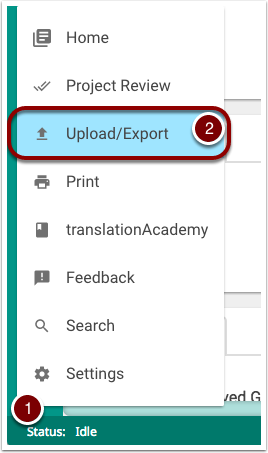
When you are called to collect or “harvest” a chapter from a translator, you can do it from within the translationStudio program. Without stopping them or quitting the program or closing the project, click on the menu in the lower left corner and choose Upload/Export from the menu.
Export or Back Up the Project (Alternate Step 1a)
If the project has been closed, you can also export it using the details button in the Home screen.
Export or Back Up the Project (Alternate Step 1b)
In the “modal” dialog that opens, click on the upward arrow icon.
Export or Back Up the Project (Step 2)
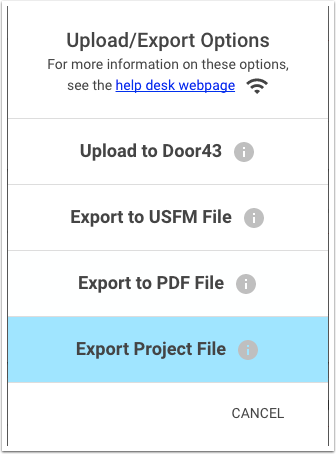
Whichever way you choose to export, select Export Project Filefrom the resulting modal dialog box.
Export or Back Up the Project (Step 3)
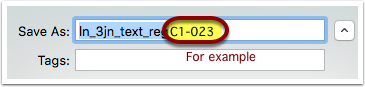
When you name the export, instead of just using the default name (which shows the language, book, and translation type) add the chapter and computer number to the end. This isn’t necessary for the process, but it makes it easier to track what has been harvested, from whom, and also lets you concentrate on the proper part of the book when you merge it. (Hat tip to John Streeter for this idea.)
Save the Project file on a flash USB device (pen drive). Be sure it has copied properly, and that the device is ejected properly. (I found that looking at the file size was helpful in determining whether the export was successful.)
Import the Project File (Step 1)
Take the flash drive back to the Tech’s computer (or whatever central computer the MAST director wants to use). From the menu in the **Home **screen (in the lower left corner) Choose Import
Import the Project File (Step 2)
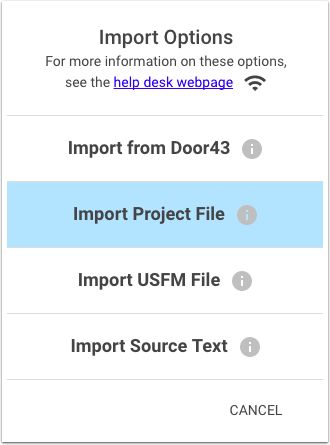
Then, from the choices, choose Import Project File. Only Import from Door43 requires an Internet connection.
Import the Project File (Step 3)
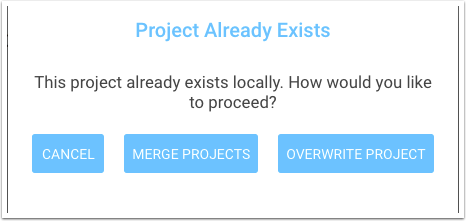
If the Project already exists on the collection computer (if this is not the first chapter harvested) you will be asked how to proceed. Choose Merge Projects.
Import the Project File (Step 4)
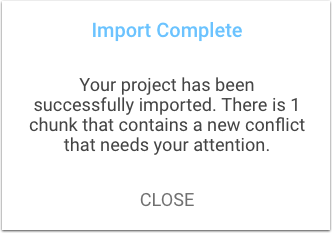
Hopefully, the import will be successful. If it is not, try to export the file from the translator’s computer again.
If there is conflicting information in any of the chunks of the imported file, compared to the one already on the computer, you will be notified here.
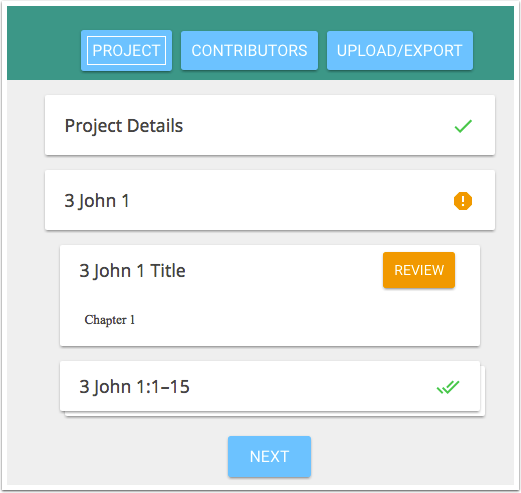
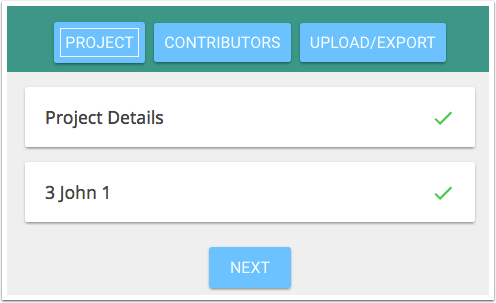
Project Review (Step 1a)
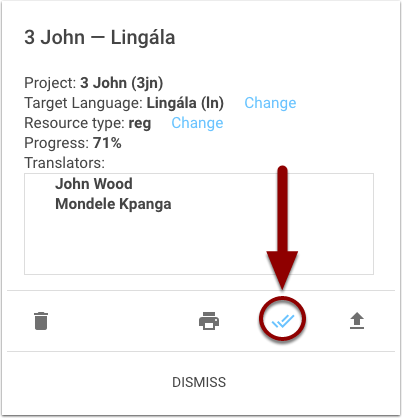
You can begin the Project review from the **Home **screen by clicking on the details button.
Project Review (Step 1b)
Then, choose the doubled check mark (or tick mark)
Project Review (Alternate Step 1)
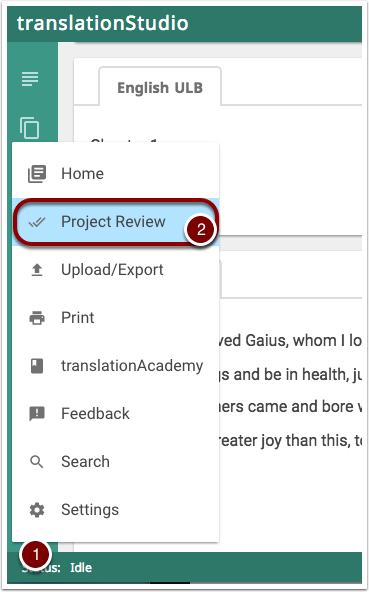
If the project is open on the collection computer, you can begin the review by selecting Project Review from the menu in the lower left corner of the window.
Project Review (Step 2)
In the Project Review modal dialog you will see a green check (or tick) by each item that is complete. If there is a problem, it will be flagged for review.
In this case, the Chapter Title was not marked complete.
Project Review (Alternative Step 2)
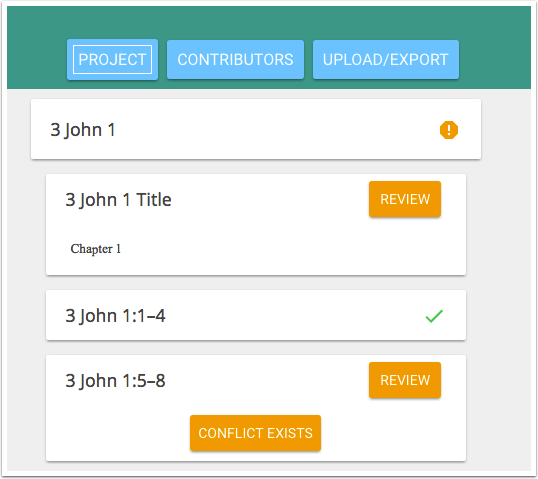
If there is a conflict in the project (a change made in two different versions of the book, where one change is not before or after the other change) you will have the chance to review the conflict, as well.
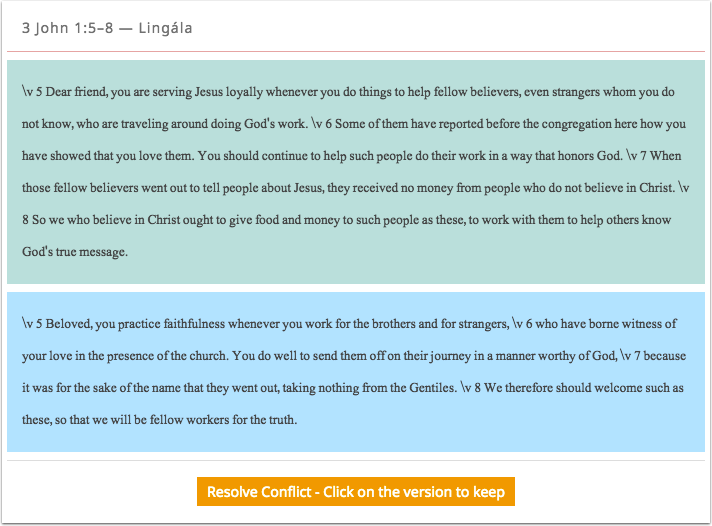
If you review the conflict, you will be given a choice of the two versions of the chunk. Conflicts are always chunk by chunk. Resolve all conflicts before importing a third version of the book, as translationStudio is not equipped to deal with a three-way choice.
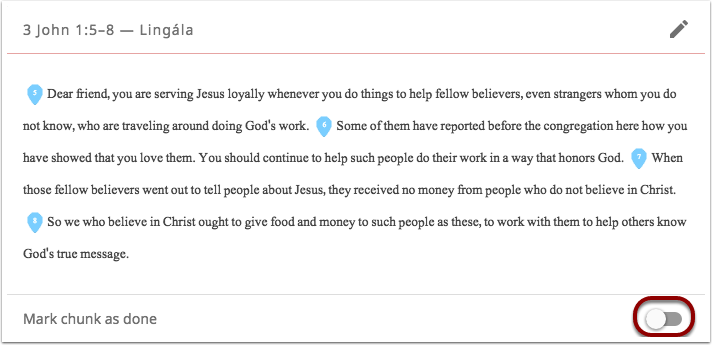
After resolving the conflict, make sure the verse markers are in the right place, and close the chunk.
Project Review (Step 4)
Once every chunk is complete and there are no more conflicts, you will see only green check (or tick) marks. If there is more than one chapter in the book, the check (or tick) marks will be doubled. Click Next to move on.
Project Review (Step 5)
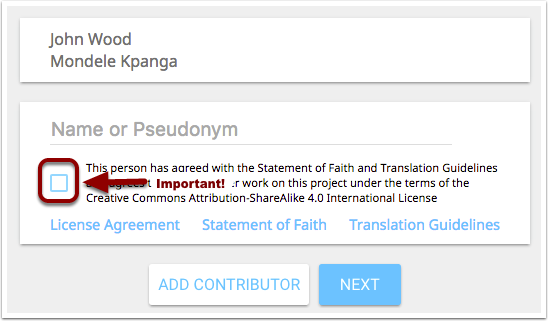
After the project has been confirmed complete, you can review the translators who participated. If you need to add the names of any translators, you can do it here. (For example, if the translators are not allowed to log in with their names on the computers, only a generic “group” name would be listed here. At this point you can credit the actual translators.) This step can be important, since the translators have agreed to the license agreement that allows the work to be used by others. Click Next when ready.
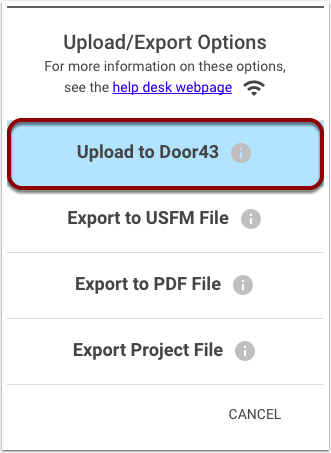
Upload to Door43 (Step 1)
Once the Project has been completed (the entire book in that language) you will want to save it to Door43. Some times you may wish to do this for a partial book, if the amount of work is substantial. You will need an appropriate Internet connection for this step. As before, choose Upload/Export, or click the “up” arrow from the details button to choose the Export type. This time, choose Upload to Door43.
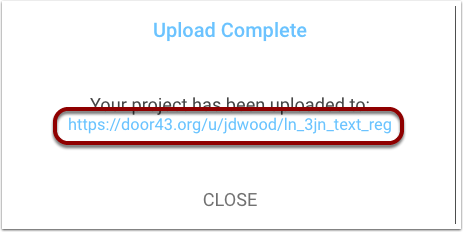
Upload to Door43 (Step 2)
If you are logged in, the Project should be uploaded to your Door43 account. The modal dialog box tells us that it is a success, and provides a link to go to the project.
Upload to Door43 (Step 3)
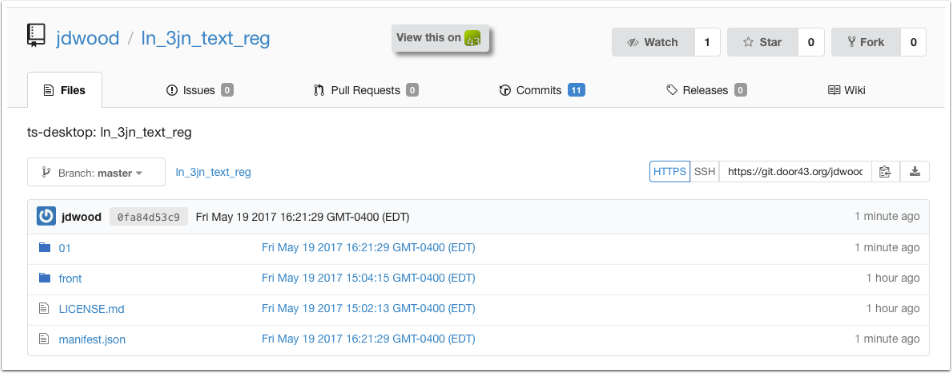
If you click on the link provided, your web browser will open to the Project page for the Project you just uploaded. In this screenshot, I can see the project files, but I can’t make changes because I’m not logged in to Door43 in my web browser.
Upload to Door43 (Step 4)
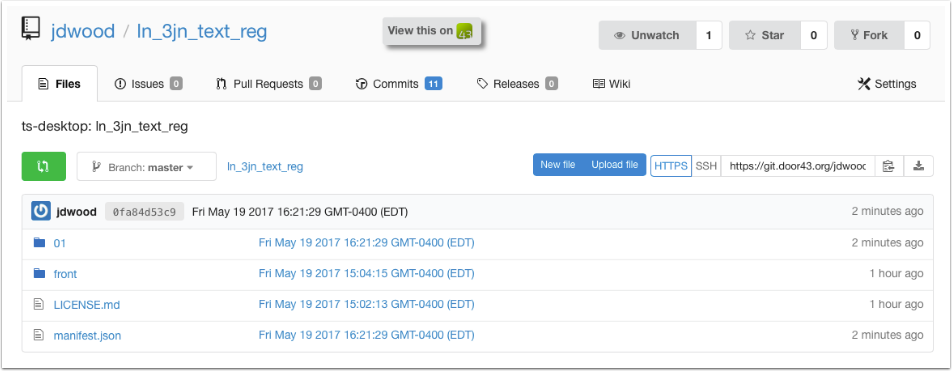
Once I have logged in to Door43 in my browser, I can see new options — specifically the New file and Upload file buttons.
Upload to Door43 (Step 5)
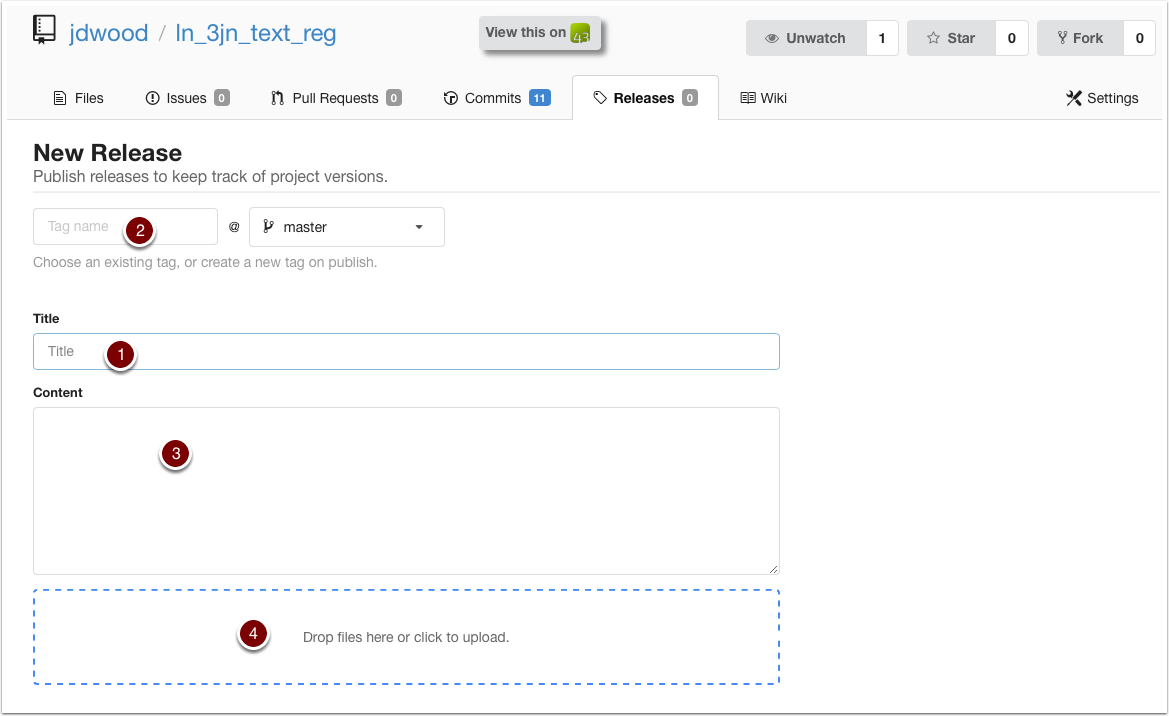
Once you have logged in, click on the Releases tab, and then on the New Release button.
Upload to Door43 (Step 6)
Give the Release a title that reflects its check status. I recommend something like Level 1.
A Tag name is also required. I usually use something like Level1.
In the Content section put information about when and where the MAST event was held at which the translation was done (or if it wasn’t done at a MAST event). This will help people to sort through multiple uploads of the same project.
If you want, you can upload the signed attestations here.