
Sometimes you will encounter an older translation project where a non-Unicode font was used to display the necessary characters for the target language. Unfortunately, while this worked at the time, it doesn’t convert well to other environments. So, we prefer to convert the files to the Unicode standard.
In this example it was pretty easy, because there were only two characters that needed to be changed. It is imaginable that we could face a much larger number of changes. Also, although the backslash character was used (`\`) because the project was in Markdown rather than USFM there was no conflict. If the project had been a book of the Bible (and used USFM) it would have been more difficult to fix.
It is best to do this work with the raw project text. There are other Help Desk articles that can help you with that if you need it.
The first thing we need to do is to compare the text we have received with the needed output. I was able to request a PDF from the local tech worker, and compare it with the text in the project.
In this case, q was used for ɛ and \ was used for ɔ.
There are a number of programs that can be used to change text in multiple files. On the Mac I use TextMate, and on Windows I use Notepad++. The needed characters in Unicode can be gotten through the Emoji & Symbols on the Mac and the charmap.exe program on Windows. You can also find the characters at https://www.unicode.org/charts/index.html.
Please note that in this case ɛ and ε are not the same character. The first is the open e from the International Phonetic Alphabet block of the Unicode standard, and the second is small epsilon, from the Greek block. We should be careful to try to pick the correct character, rather than the first one that looks right.
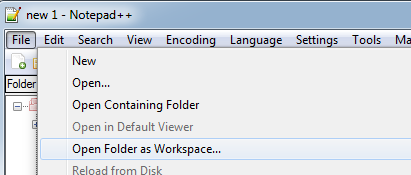
Once we have found the correct characters, we can use our text editor to make the changes. In Notepad++ we go to the File menu and choose Open Folder as Workspace… Then pick the top level folder in the project.
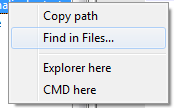
Right-click on the folder and choose Find in Files…
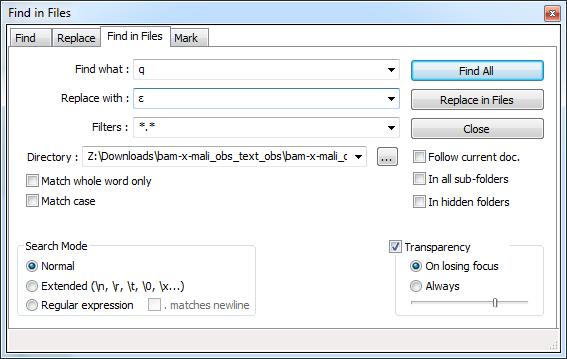
In the dialog that comes up, put the current character in the field marked Find what: and the desired character in Replace with: When you click on Replace in Files you will be asked to confirm the changes. It doesn’t take long for all of the changes to be made. Now, repeat the process for each of the other characters that need to be corrected.
If you would like to have these instructions for TextMate, or if you need a workflow for Linux, please contact the Help Desk.